¶ Introduction
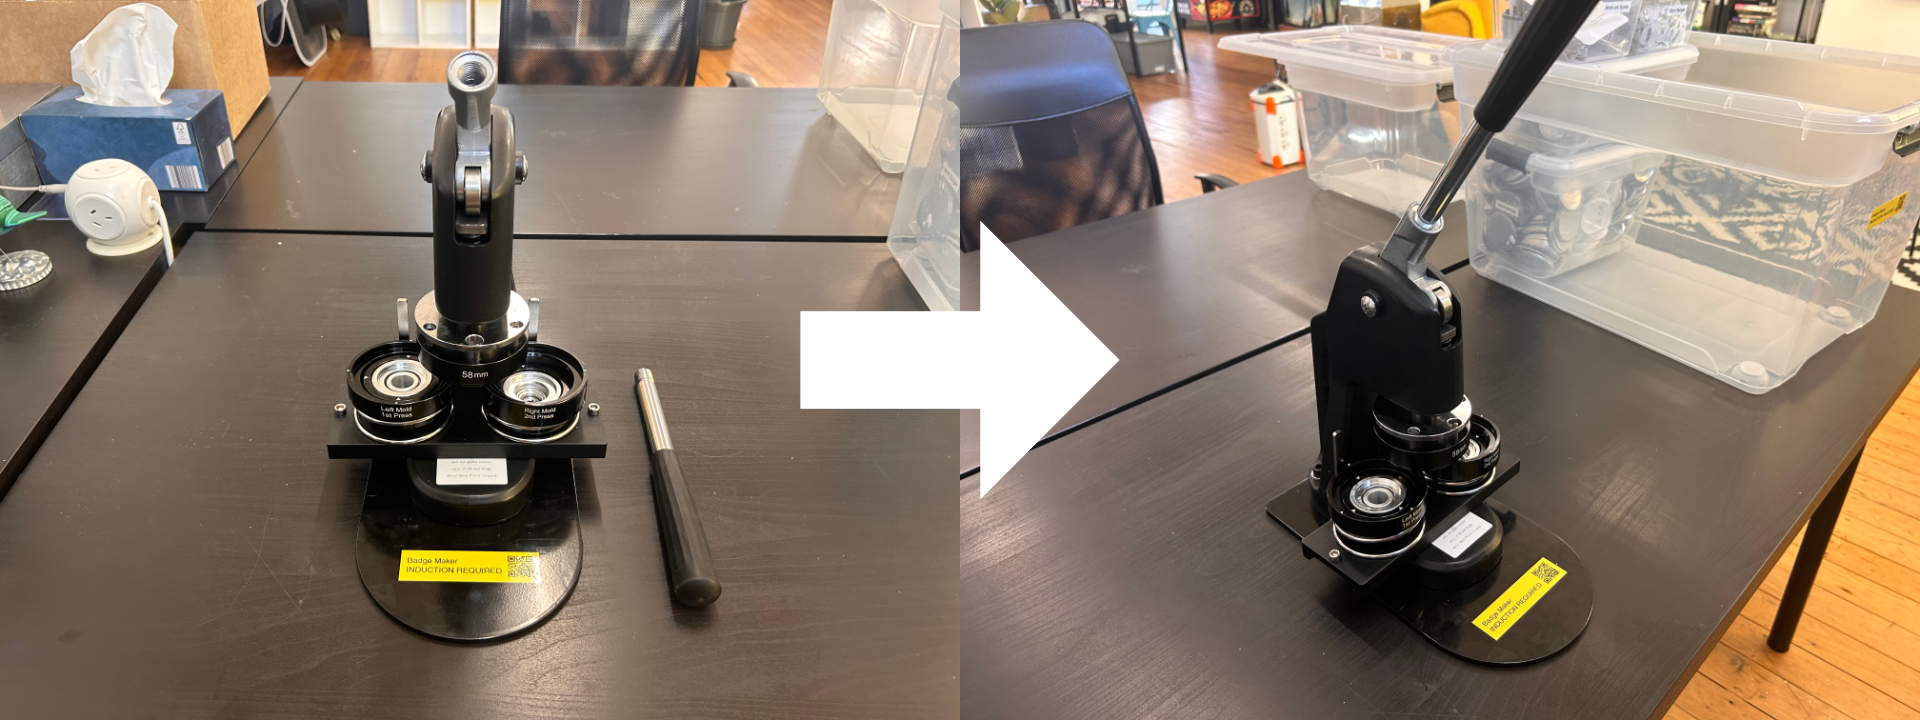
We have a Vevor Button/Badge Maker for creating buttons, badges, fridge magnets and similar. It has a very solid metal construction and is much more durable and easy to use than the flimsy plastic ones. We have molds and consumables for both 25mm and 58mm badges, and 58mm fridge magnets.
The different consumables and molds are stored in plastic boxes inside the badge maker storage container. Once the snack and consumables vending machine is operational, badge consumables will be moved there.
![]()
![]()
¶ Specification
- Induction Class: 🟢 Green Tool (No Induction Required - read this entire page)
- Costs: $1 per 58mm magnet, $0.50 per 58mm badge, $0.25 per 25mm badge, OR $0 if you bring your own materials
- Available Badge Sizes: 25mm and 58mm (more if we buy the right consumables/molds)
- Available Fridge Magnet Sizes: 58mm (more if we buy the right consumables/molds)
- Instruction Manual (pretty useless see instructions below)
¶ Induction Process
🟢 This tool does not require an induction. (but you can always ask for help in Discord)
Please make sure you read this entire page in full, to avoid injury.
¶ Tool Safety
¶ Potential Hazards
| Potential Hazard | Details |
|---|---|
Hand Crush |
Hands may be crushed by the badge maker during operation. |
Sharp Element |
The pins from the badges and paper cutting tools have sharp edges. |
¶ Operating Instructions
¶ Before Use
- Attach the handle firmly by screwing it all of the way in.
- Create your badge by printing or drawing a design, then use one of the circular cutting tools to cut out a 35mm (for 25mm badge) or 70mm (for 58mm badge) circle.
1. Remove the foam blade protector and set the cutting arm to the correct cutting radius with a ruler.
2. Center the round part over your drawing/print and attach the cutting arm.
3. Gently push down and rotate in the direction of the blade (pay special attention to rotate in the direction the blade is angled - usually clockwise).
4. Attach the foam blade protector and put back inside the small plastic container.
5. Here's a video of the whole process.
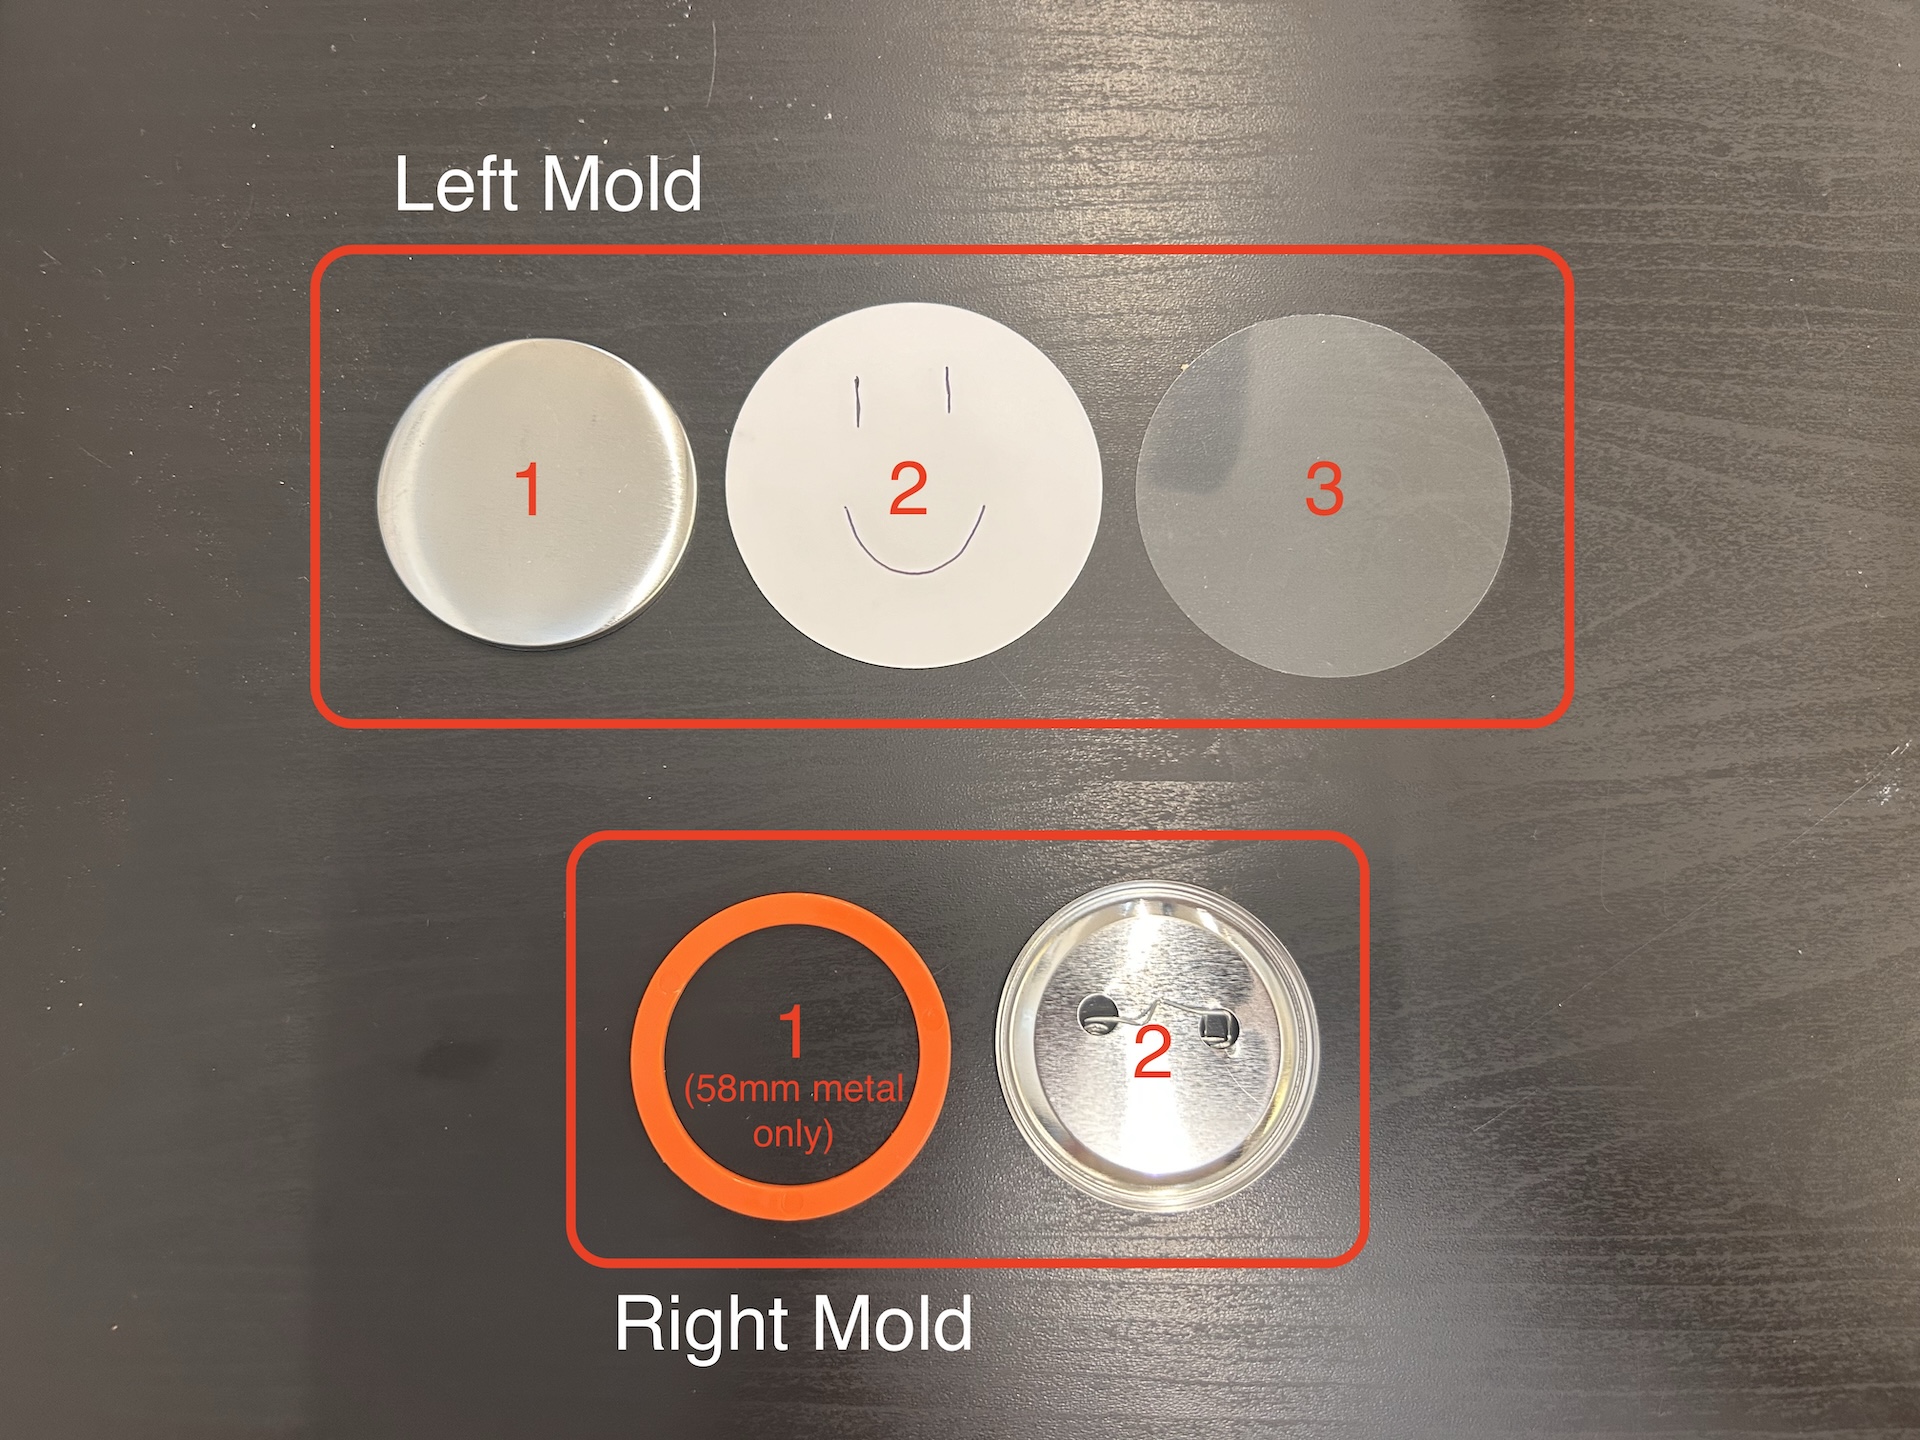
- Grab a top metal piece, your paper, a clear plastic piece, and the metal or plastic backing piece. All the pieces you need are pictured below (note the orange spacer is only required when using a 58mm metal backing piece).
¶ During Use
Never put your hands or fingers in between the molds for any reason. Very serious crush injuries can occur.
There is a video at the end, but please read through all of the instructions first.
- Push the mold slider all the way to the left.
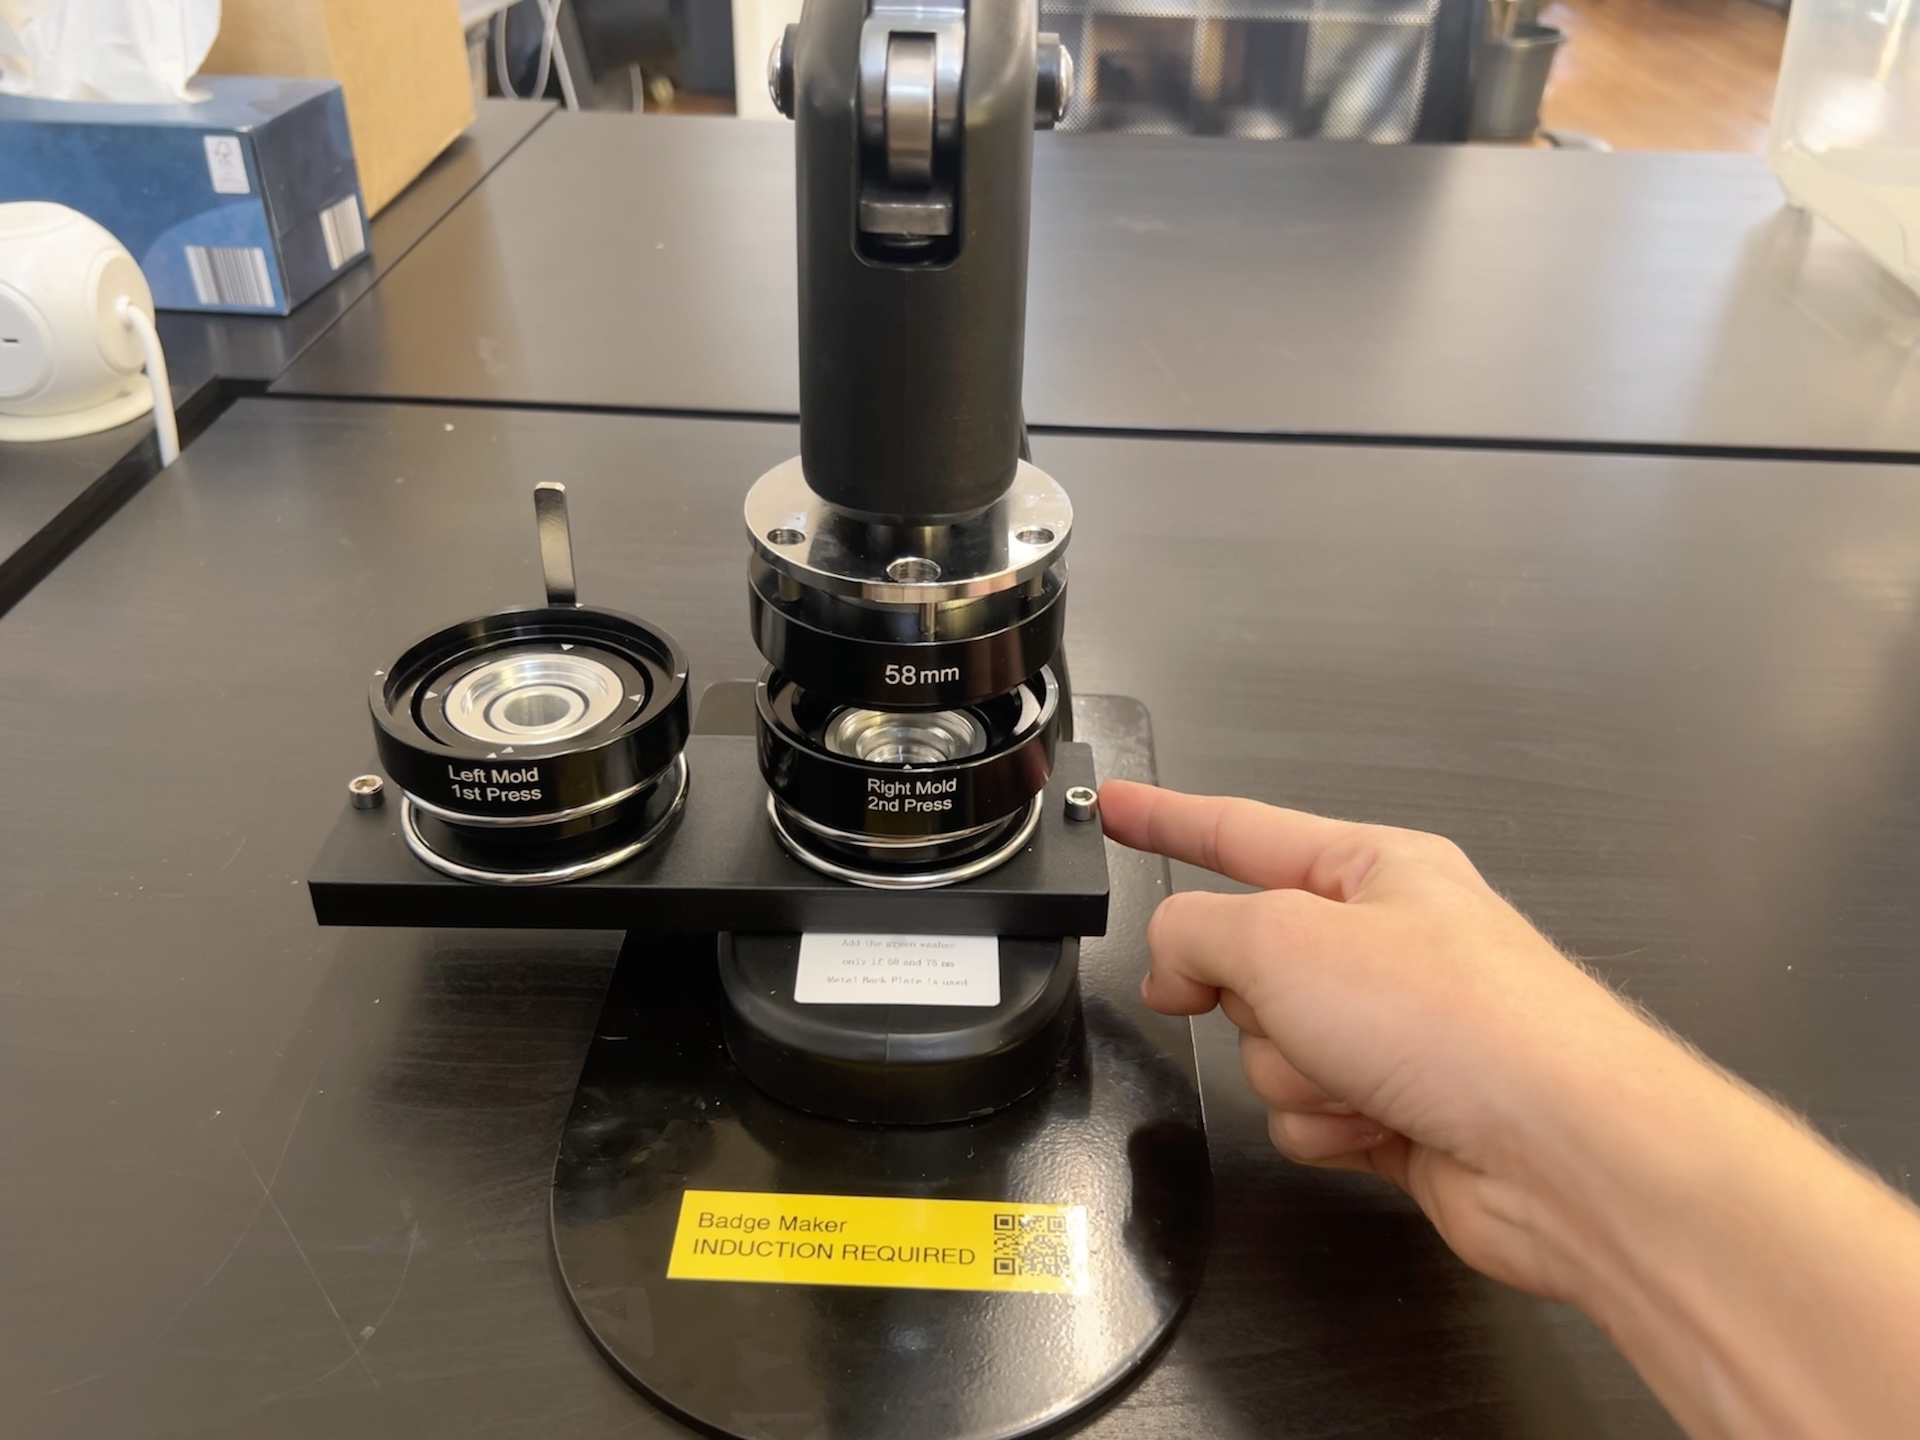
- In the left mold place the top metal piece, then your paper, and finally the clear plastic piece.
- Push the mold slider all the way to the right, and gently pull the lever all the way down. The spring under the bottom mold should compress all the way down when viewed from the left of the mold.
- If using a 58mm metal backing piece, place an orange spacer ring in the right most mold. Place the metal or plastic backing piece in the right most mold - making sure it's level and the right way up (pin or magnet side faces down).
- Push the mold slider all the way to the left, and gently pull the lever all the way down. The spring under the bottom mold should compress all the way down when viewed from the left of the mold.
- Push the mold slider all the way to the right again, and carefully remove the finished badge.
End to end process is shown in the video below (may take a while to load):
¶ After Use
- Remove the handle by unscrewing it all of the way and place it back inside the storage container.
- Place the badge maker and all of the small plastic containers back inside the storage container.
- Clean up any paper off cuts or excess badge materials and put the badge maker storage container back on the shelf.
¶ Changing the mold
The 58mm mold is the most commonly used one and should always be left in the machine when you're done. Do not leave the 25mm mold in the machine. If you want to make tiny badges/buttons, you can swap it over to the 25mm and then back again by following these steps.
- Push the mold slider all the way to the right.
- Gently pinch the top mold on both sides to bring the black part up to the silver part.
- Use one hand to prevent the lever from moving down, and the other hand to pull the mold down off the lever mechanism. It is magnetic, and requires quite a bit of force to remove.
- Remove the mold - which may require slight jiggling to get out from under the lever mechanism.
- Slide the new mold in, silver side up, with the sideways protuding pin angled to the left of the vertical silver bar (pointed towards the white trianlge on the bottom mold).
- Twist the newly inserted mold to the right until it stops, then raise it onto the lever mechanism until it snaps into place. You will have to jiggle it quite a bit side-to-side and back-to-front to get it to snap into place. If you have problems, check the alignment protusion on the rear of the upper mold and make sure it goes in perfectly vertically.
- When you are done with the new mold, follow the steps above to switch back to the 58mm mold. Only the 58mm is allowed to be left in the machine when you are done.